Linux手动安装
💡
安装RunnerGo前需安装Docker。 Linux操作系统的Docker软件包和安装文件:https://download.docker.com/linux/ 安装Docker Engine说明:https://docs.docker.com/engine/install/ 麒麟系统安装Dokcer:https://download.docker.com/linux/static/stable/aarch64/
1、准备 docker 和 docker-compose 环境
git clone https://github.com/Runner-Go-Team/RunnerGo.git
或
git clone https://gitee.com/Runner-Go-Team/RunnerGo.git

2、进入RunnerGo目录
cd RunnerGo/runnergo

3、启动RunnerGo
docker compose up -d
由于启动的中间件多,请耐心等待下载完成后,使用下面命令查看是否都启动成功
docker compose ps
4、使用RunnerGo
安装成功后,在浏览器打开以下地址页面,即可登录使用
默认超管账号runnergo 密码runnergo
地址:http://本机外网地址:9998

查看本机外网地址
curl ipinfo.io
5、其他事项
准备 docker 和 docker-compose 环境报错

这是由于没有git安装导致,使用 YUM 包管理器安装 Git 工具
yum -y install git

再准备 docker 和 docker-compose 环境即可
git clone https://github.com/Runner-Go-Team/RunnerGo.git
或
git clone https://gitee.com/Runner-Go-Team/RunnerGo.git
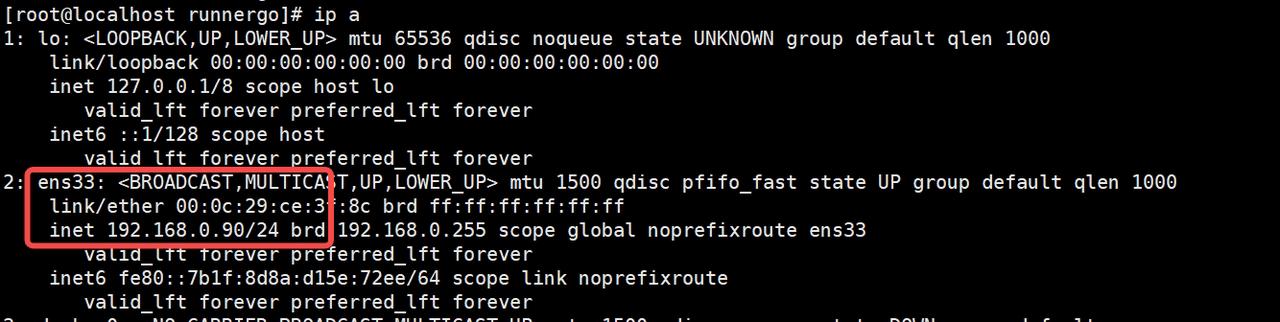
虚拟机访问内网ip
查看内网地址
ip a
更新镜像源(下载缓慢情况,无需可省略)
使用 HTTP 源并安装
apt install apt-transport-https ca-certificates
编辑sources.list
vim /etc/apt/sources.list
更新使用镜像、、、、、、、、、、、、、、、、、、、、、、、、、、、、、、、、、、、、、、、
# 默认注释了源码镜像以提高 apt update 速度,如有需要可自行取消注释
deb https://mirrors.tuna.tsinghua.edu.cn/debian/ bookworm main contrib non-free non-free-firmware
# deb-src https://mirrors.tuna.tsinghua.edu.cn/debian/ bookworm main contrib non-free non-free-firmware

deb https://mirrors.tuna.tsinghua.edu.cn/debian/ bookworm-updates main contrib non-free non-free-firmware
# deb-src https://mirrors.tuna.tsinghua.edu.cn/debian/ bookworm-updates main contrib non-free non-free-firmware

deb https://mirrors.tuna.tsinghua.edu.cn/debian/ bookworm-backports main contrib non-free non-free-firmware
# deb-src https://mirrors.tuna.tsinghua.edu.cn/debian/ bookworm-backports main contrib non-free non-free-firmware

deb https://security.debian.org/debian-security bookworm-security main contrib non-free non-free-firmware
# deb-src https://security.debian.org/debian-security bookworm-security main contrib non-free non-free-firmware
按Esc后输入":wq!"退出
更新
apt update